Quick Start
The best way to discover Iottly is through the Getting Started project, which comes pre-loaded in every new account. It includes an Elastic Pi — a virtual device already connected to the platform — so you can explore all features without any physical hardware.
The demo simulates a simple scenario: an Elastic Pi is virtually connected to temperature and humidity sensors and regularly reads values from them.
Step 1 — Check the Elastic Pi in Device Configuration
Open the Device Configuration panel. You should see your Elastic Pi listed with a connected status.
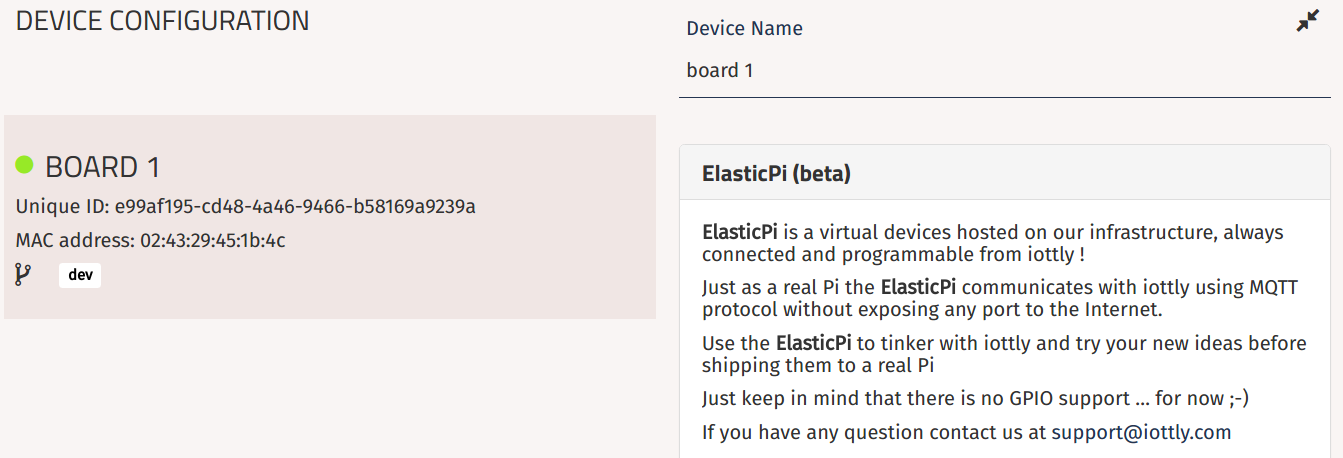
Every device registered in Iottly gets a Unique ID (used as the MQTT username for authentication) and its MAC address is recorded to allow re-registration after a factory reset.
Step 2 — Explore the Management Scripts
Open the Management Scripts panel. This is where the Python code that runs on the device lives.

The code is split into two sections:
global section — helpers and variables
def read_data_from_sensor(sensortype):
    """simulates the reading of a sensor randomly generating values"""
    if sensortype == "temperature":
        # randomly generate temperature value
        return round_reading(random.uniform(30, 50))
    elif sensortype == "humidity":
        # randomly generate humidity value
        return round_reading(random.uniform(20, 80))
This function simulates sensor readings by generating random values. In a real deployment it would read from actual hardware (GPIO, I2C, serial, etc.).
loop section — the main device loop
def loop():
    """the main loop of your device, running on a dedicated process"""
    # polls temperature and humidity every 5 sec,
    # storing them in global variables (defined in the global section)
    temp_value.value = read_data_from_sensor("temperature")
    hum_value.value  = read_data_from_sensor("humidity")
    time.sleep(5)
The loop function runs continuously in a dedicated process. Here it polls both sensors every 5 seconds and stores the readings in shared global variables.
Step 3 — Send a remote command
Open the Messages panel. A command called read_sensor_data has already been defined:
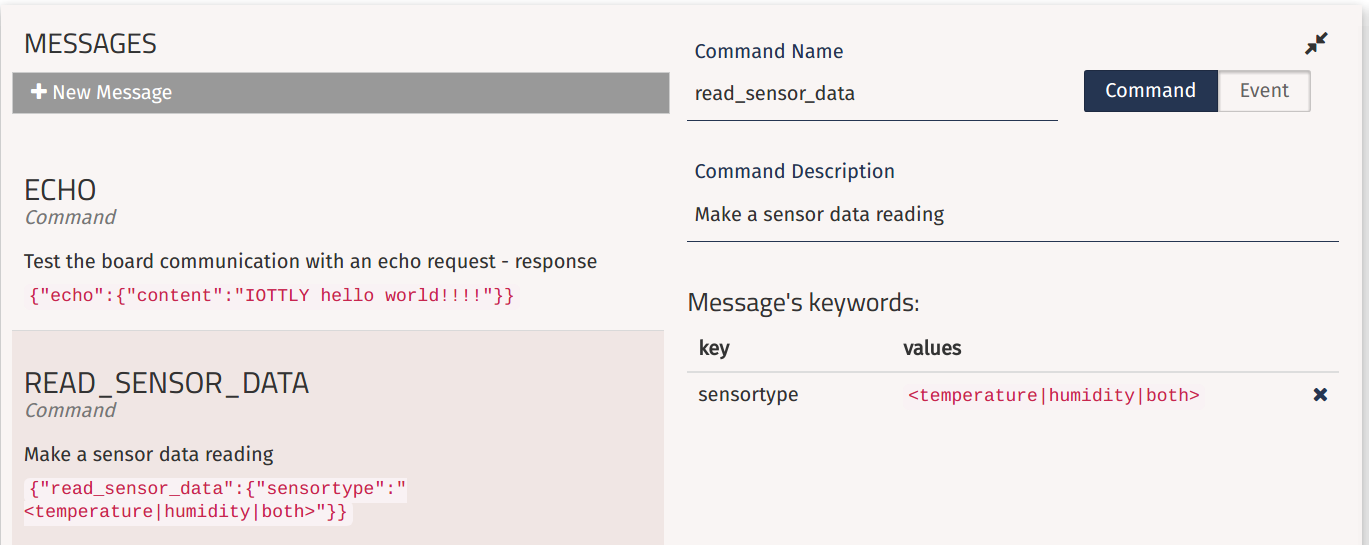
{"read_sensor_data": {"sensortype": "<temperature|humidity|both>"}}
read_sensor_datais the message type — it identifies what the command does.sensortypeis a keyword that accepts three values:temperature,humidity, orboth.
Iottly automatically generated the handler function for this command:
def read_sensor_data(command):
    """
    Handle the read_sensor_data command.
    Format: {"read_sensor_data": {"sensortype": "<temperature|humidity|both>"}}
    """
    cmdpars = command["read_sensor_data"]

    if cmdpars["sensortype"] == "temperature":
        sensor_data_reading = {"temperature": temp_value.value}
    elif cmdpars["sensortype"] == "humidity":
        sensor_data_reading = {"humidity": hum_value.value}
    elif cmdpars["sensortype"] == "both":
        sensor_data_reading = {
            "temperature": temp_value.value,
            "humidity":    hum_value.value,
        }

    message = {"sensor_data_reading": sensor_data_reading}
    send_msg(message)  # send the reply over MQTT
Step 4 — Test it from the Console
Open the Console panel. Because the read_sensor_data message was defined in the Messages panel, Iottly has already created an interactive command button for it here.

Click read_sensor_data and choose a sensortype. You should see the reply appear in the Logs panel — newer messages are at the bottom.
Try it yourself: add a temperature alarm
Paste this snippet inside the loop function, just before time.sleep:
if temp_value.value > 48:
    alarm   = {"description": "temperature too high", "temp_value": temp_value.value}
    message = {"ALARM": alarm}
    send_msg(message)
Then click Flash over-the-air to deploy the new code to the Elastic Pi. After the agent restarts you will see alarm messages in the Console panel whenever the randomly generated temperature exceeds 48°.
Make the threshold configurable remotely
Want to change the alarm threshold without redeploying? You can do it entirely remotely:
-
Create a new command in the Messages panel, e.g.
set_alarm_threshold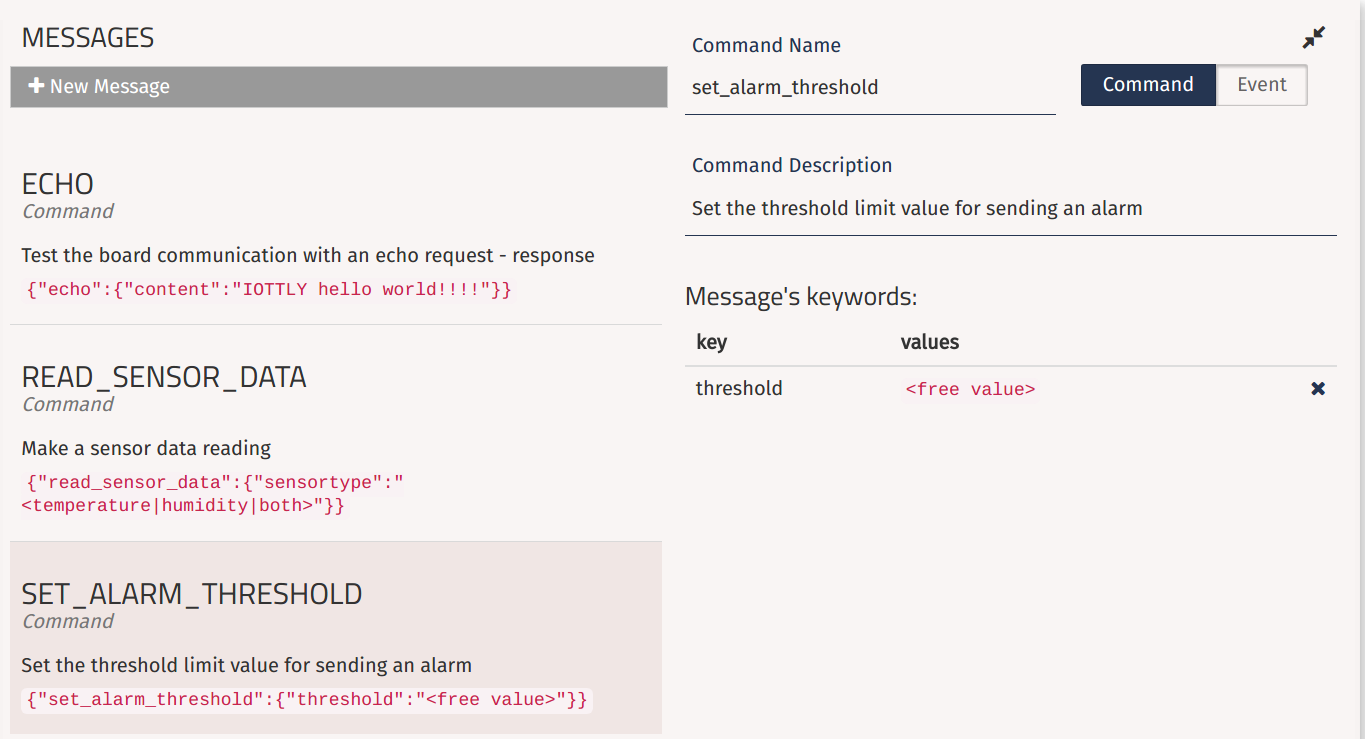
-
Add a global variable for the threshold in the
globalsection:Threshold = multiprocessing.Value('d', 45.0) -
Fill the generated handler
set_alarm_thresholdwith:limit = cmdpars["threshold"] Threshold.value = float(limit) change = {"new_threshold_value": Threshold.value} send_msg(change) -
Update the loop to use the variable instead of the hardcoded value:
if temp_value.value > Threshold.value: -
Flash over-the-air and test from the Console.
Next steps
- Configuration — install the agent on a physical device
- API Overview — integrate Iottly into your backend
- Full tutorials on iottly.github.io ↗